


• WH-0202-94 “Symbols and Drawing Rules for Stage Lighting”
• WH-0204-1999 “Testing and Evaluation of the Optical Quality of Stage Lighting Fixtures”
• GB/T 15734-1995 “Limits and Measurement Methods for Radio Disturbance Characteristics of Electronic Dimming Equipment”
• GB/T 7002-86 “Photometric Testing of Floodlights”
• GB 7000.15-2000 “Safety Requirements for Lighting Fixtures Used in Stage Lighting, Television, Film, and Photography Venues (Indoor and Outdoor)”
• GB 7000.14-2000 “Safety Requirements for Ventilated Lighting Fixtures”
Illuminance Specifications: The average stage illuminance shall not be less than 1,200 lux. At any point within the performance area, lighting shall be provided from no fewer than three directions, with the maximum white light illuminance (single-lamp effect) in each direction not less than 1,000 lux; the maximum white light illuminance in the main performance area shall exceed 1,500 lux.
Color Temperature: 3,200 K for standard fixtures; 6,000 K for follow spots.
Lighting Angles: Each performance position must have lighting angles from at least four directions to create a three-dimensional lighting effect. Glare, reflections, and unnecessary light spots must be prevented.
Dimming Console Interference Resistance Specifications: Must exceed the Class 1 standards specified in the national standard “Limits and Measurement Methods for Radio Disturbance Characteristics of Electronic Dimming Equipment,” with a rise time of no less than 400 μs.
Use Cases:
I. Auditorium:
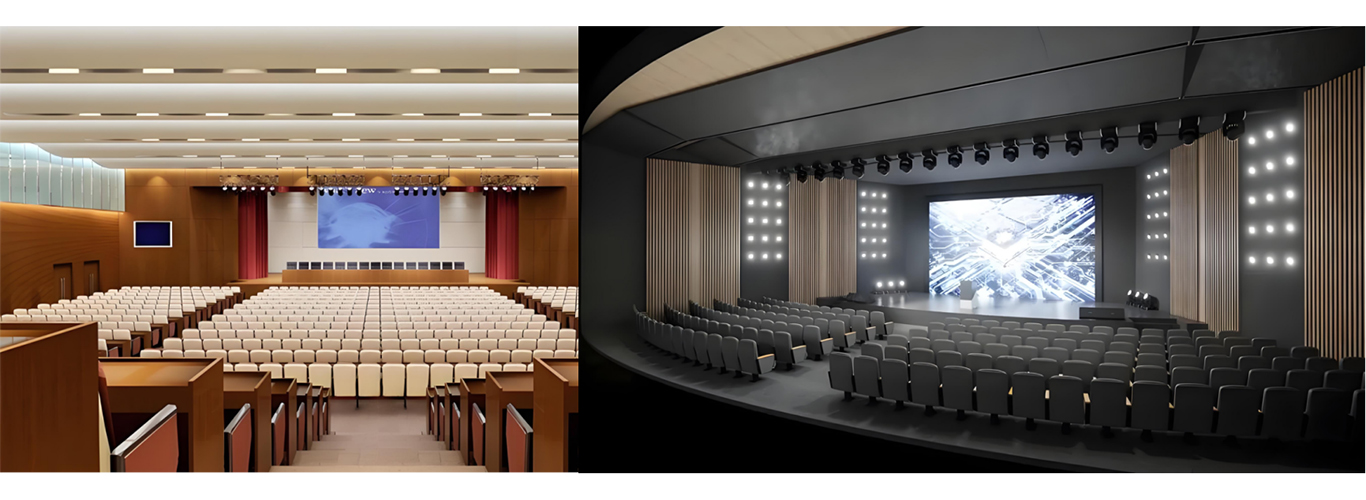
An auditorium typically refers to a venue specifically designed for hosting academic presentations, lectures, seminars, corporate meetings, and other formal speaking events. It not only enhances a company’s professional image but also improves the experience for attendees and ensures the smooth running of the event.
The Importance of an Auditorium:
• Visual Clarity: Lecture halls are typically used for formal occasions such as academic lectures, corporate presentations, and government briefings. The lighting system must ensure that both the speaker and the presentation content are clearly visible to the audience. Appropriate lighting helps the audience focus better on the speaker while also ensuring that presentation materials—such as PowerPoint slides or documents—are sufficiently bright and clear when displayed.
• Creating the Right Atmosphere: Although the atmosphere in lecture halls is generally formal and professional, the lighting system can still create an appropriate academic or business atmosphere by adjusting the color temperature and brightness of the light. For example, using neutral or cool-toned lighting can convey a sense of professionalism and rigor.
• Guiding Attention: Changes in lighting can effectively guide the audience’s attention. For example, when a speaker needs to highlight a key point, spotlights or targeted lighting can be used to emphasize that section, helping the audience focus their attention.
• Dynamic Effects: Lighting systems in modern lecture halls often incorporate advanced technologies, such as programmable lighting controls and dynamic effect generation. These technologies not only enhance the diversity and controllability of lighting effects but also reflect the modernity and professionalism of the venue.
Small Auditorium:
The stage lighting positions should be arranged in a comprehensive, three-dimensional layout. Lighting positions such as front lighting, first overhead lighting, second overhead lighting, and third overhead lighting form a comprehensive lighting array, ensuring that every part of the stage is illuminated and eliminating any blind spots. The arrangement can be flexibly and variably configured as needed. In accordance with the Client’s vision, this stage should be designed with a conference lighting system meeting the standards of a lecture hall, suitable for various types of meetings.
This proposal incorporates: one front light and three overhead lights.
This configuration is designed exclusively for conference and presentation purposes and does not include entertainment or performance effects.
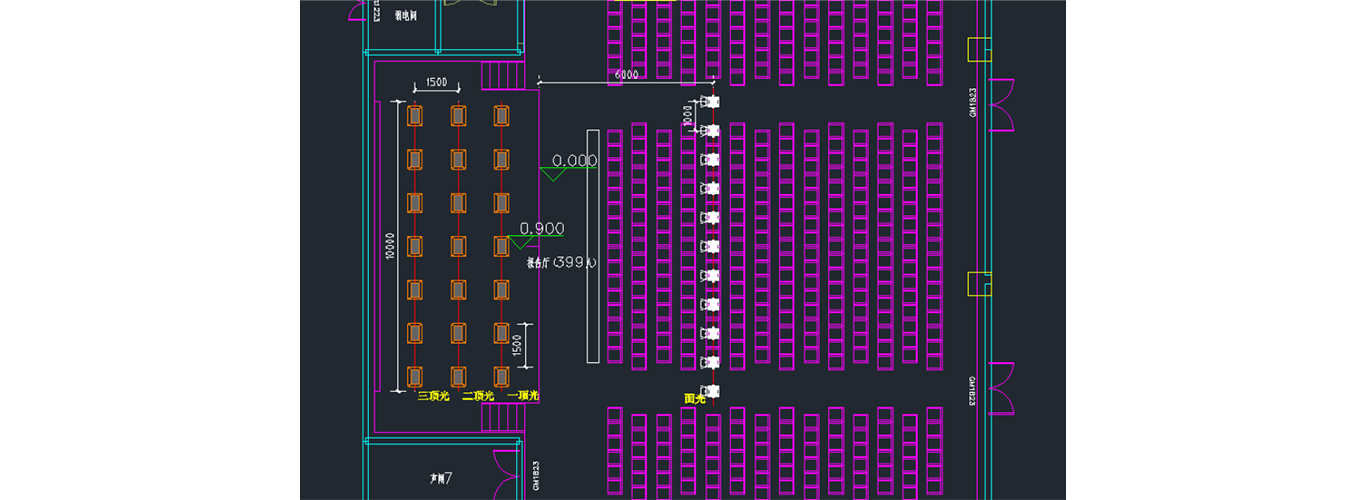
Small Auditorium Design:
1. Front Lighting Configuration Instructions: Front lighting serves as the main light source for the front of the performance area. It is primarily used to illuminate the front portion of the stage, providing front lighting for performers on stage to highlight their figures or create a three-dimensional effect for objects on stage.
A. Lighting fixtures are configured as follows:
Front Light 1: 11 front lights, with adjustable color temperature (cool/warm)
Mounted above the audience; one fixture is installed approximately every 1.5–2 meters along the front light truss.
Fixture Types: COB par cans, four-head par cans, spotlights
B. Fixture Arrangement and Projection Methods:
Cross-projection: Enhances brightness in the center of the stage and in the depth of the stage;
Spotlighting: Enhances illumination in specific performance areas of the stage.
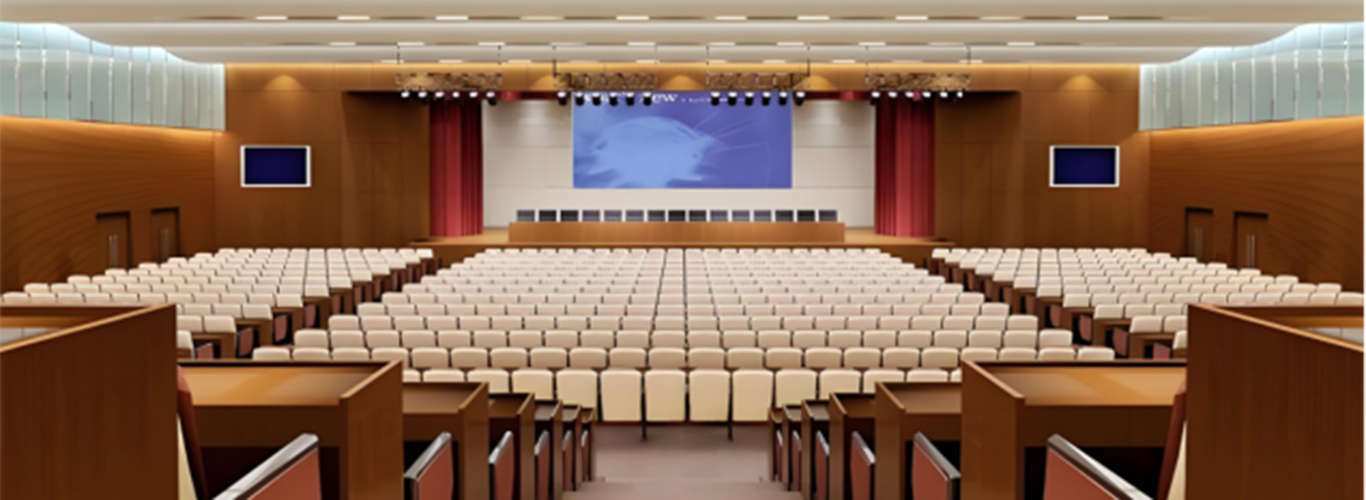
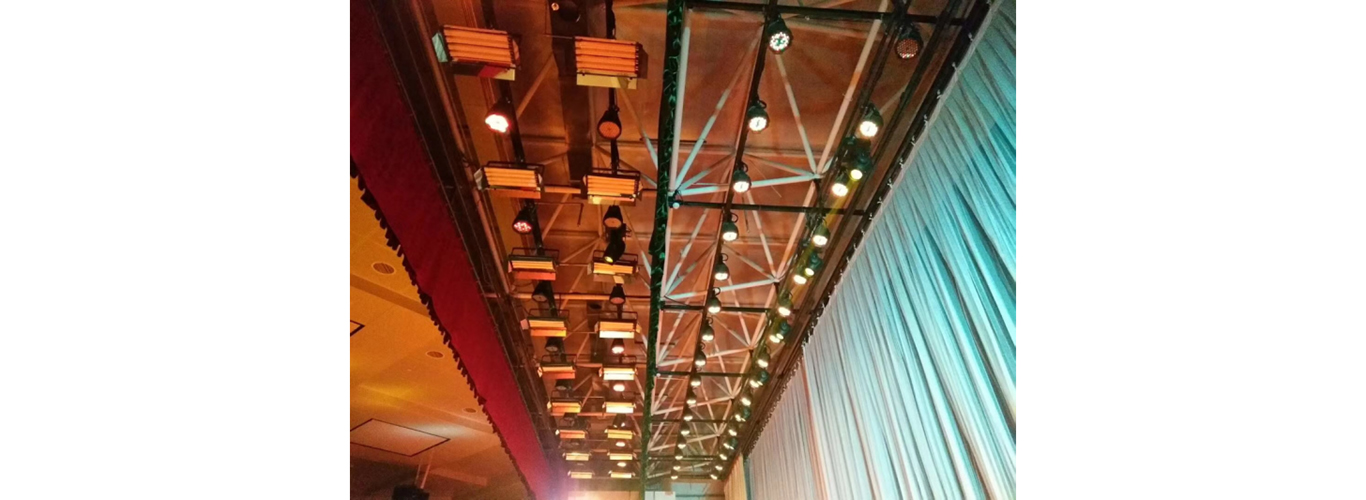
2. Overhead Lighting Configuration: Overhead lights are installed above the stage at intervals of approximately 1.2 m to 2.0 m. The fixtures are suspended from the bottom of the lighting truss and serve to provide necessary illumination for the performance space extending into the depth of the stage. Overhead lighting includes front lighting and backlighting, which can be arranged in overlapping patterns on the same truss. Fixtures may be configured according to the performance requirements.
A. The distribution of fixtures is as follows:
• First Overhead Lighting: 7 x 200W color-temperature-adjustable LED flat soft-light fixtures
• Second Overhead Lighting: 7 x 200W color-temperature-adjustable LED flat soft-light fixtures
• Third Overhead Lighting: 7 x 200W color-temperature-adjustable LED flat soft-light fixtures
B. Lighting Arrangement and Projection Methods:
The first overhead light should be coordinated with the front lighting to illuminate the main acting area; when coordinating these lights, pay attention to the height of the characters. The position of the first overhead light can serve as a fixed light source, and select some fixtures to enhance the lighting at key points in the performance area. The second and third lights can be directed straight toward the back of the stage, projected vertically downward, or used as backlighting directed forward, depending on the needs of the plot; this enhances the lighting of the characters’ silhouettes and the spatial depth of the set.
Main Auditorium:
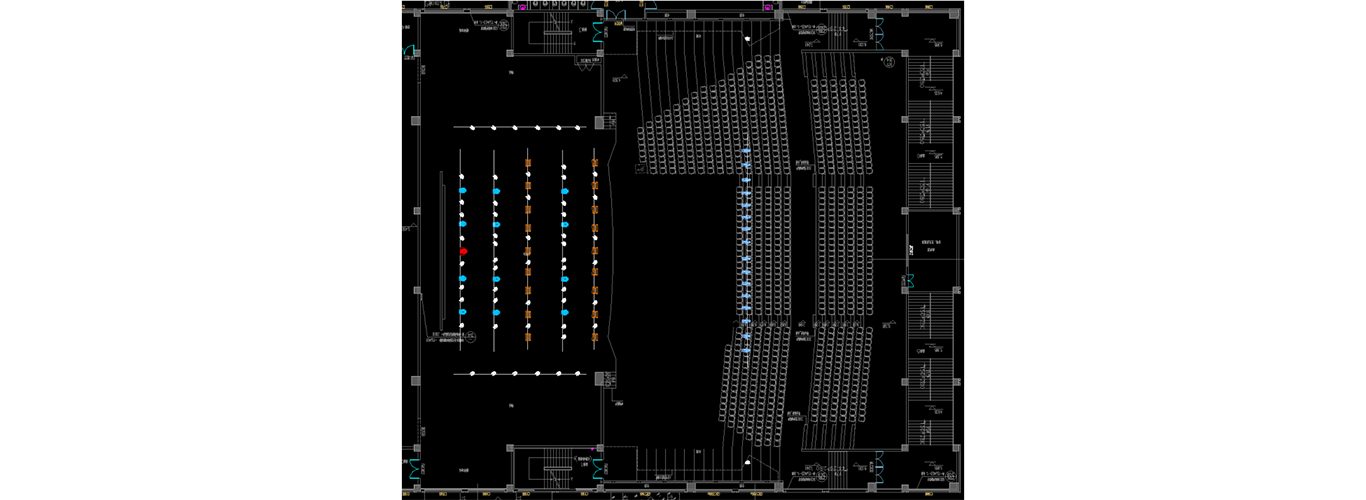
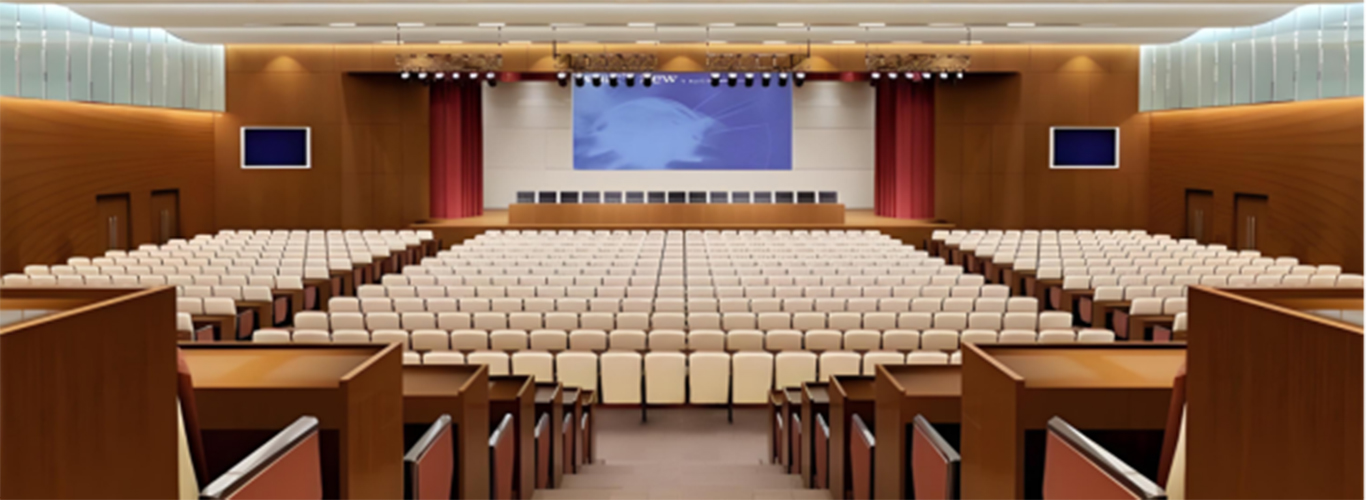
The stage lighting positions should be arranged in a comprehensive, three-dimensional layout. Front lighting, first overhead lighting, second overhead lighting, side lighting, and wing lighting should form a comprehensive lighting array, ensuring that every part of the stage is illuminated to eliminate blind spots. The configuration should be flexible and adaptable to meet various needs. In accordance with the Client’s vision, the stage should be designed with a conference lighting system that meets auditorium standards for use in various types of meetings.
This configuration includes: one front light, five top lights, and two side lights.
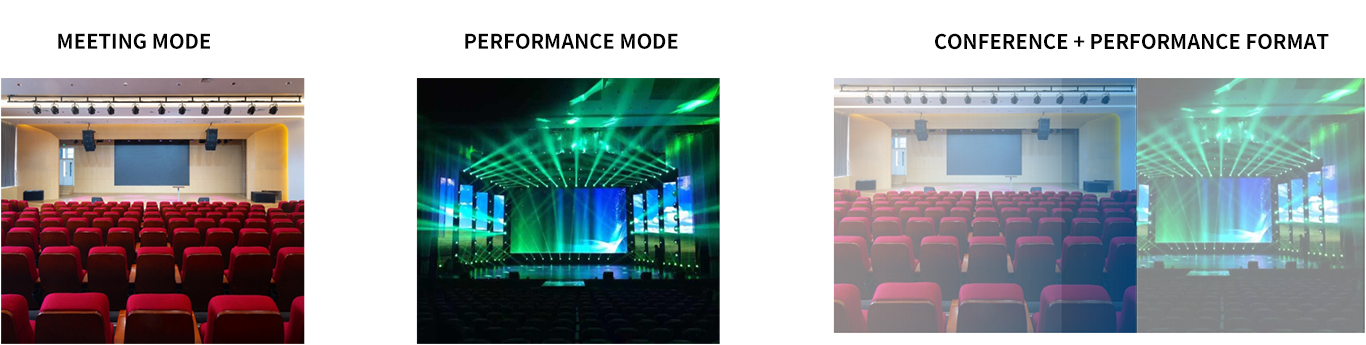
This setup combines a conference/presentation mode with an entertainment performance mode.
Main Auditorium Design:
1. Front Lighting Configuration: Front lighting serves as the primary lighting source for the front of the performance area. It is primarily used to illuminate the front portion of the stage, providing front lighting for performers to highlight their figures or create a three-dimensional effect for objects on stage.
A. Lighting fixtures are configured as follows:
Front Light 1: 11 front lights, with adjustable color temperature (cool/warm)
Installed above the audience; one fixture is placed approximately every 1.5–2 meters along the front lighting truss.
Fixture Types: Four-head fixtures, profile spotlights, and spotlights
B. Fixture Arrangement and Projection Methods:
Cross-projection: Enhances brightness in the center of the stage and in the depth of the stage;
Spotlighting: Enhances illumination in specific performance areas of the stage.
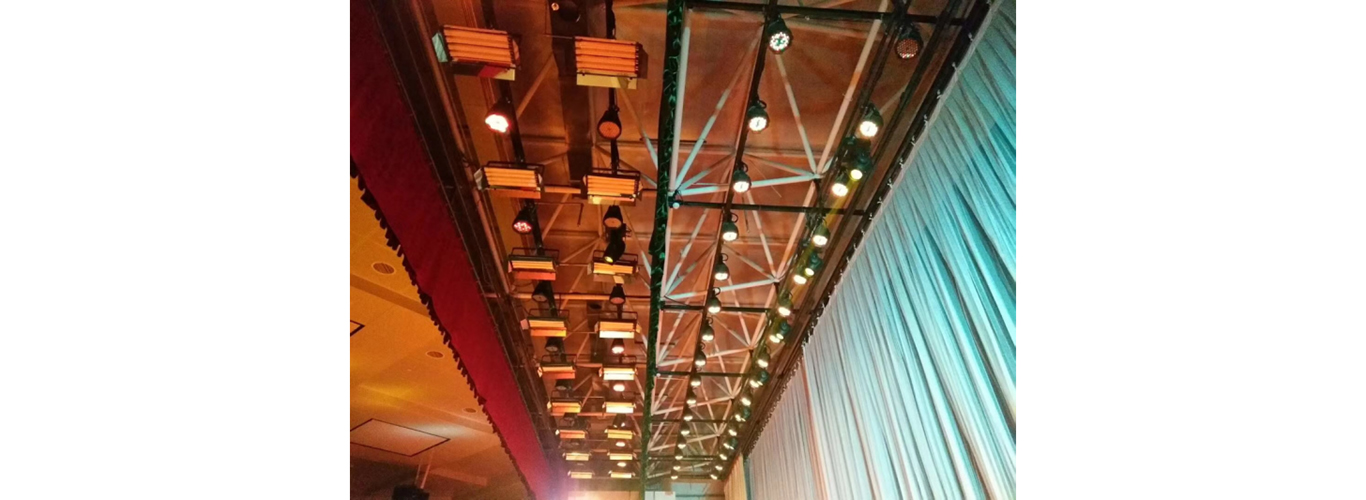
2. Overhead Lighting Configuration Instructions: Overhead lighting is installed above the stage at intervals of approximately 1.2 m to 2.0 m. The fixtures are suspended from the bottom of the lighting trusses and serve to provide necessary illumination for the performance space extending into the depth of the stage. Overhead lighting includes front lighting and backlighting, which can be arranged in overlapping patterns on the same truss. Fixtures may be configured according to the performance requirements.
A. The distribution of fixtures is as follows:
First Overhead Lighting: 13 Par lights, 12 conference lights; adjustable color temperature; effects capable
Second Overhead Lighting: 13 Par lights, 12 conference lights; adjustable color temperature; effects capable
Third Overhead Lighting: 13 Par lights, 6 profile lights; capable of projecting any pattern
Fourth Overhead Lighting: 13 Par lights, 6 profile lights; capable of projecting any pattern
Fifth lighting tier: 13 PAR lights and 6 three-in-one lights, capable of producing beams, colored effects, and patterns
B. Lighting Arrangement and Projection Methods:
The first overhead light should be coordinated with the front lighting to illuminate the main acting area; when coordinating these lights, pay attention to the height of the characters. The position of the first overhead light can serve as a fixed light source, and select some fixtures to enhance the lighting at key points in the performance area. The second and third lights can be directed straight toward the back of the stage, projected vertically downward, or used as backlighting directed forward, depending on the needs of the plot; this enhances the lighting of the characters’ silhouettes and the spatial depth of the scenery.
Main Auditorium:
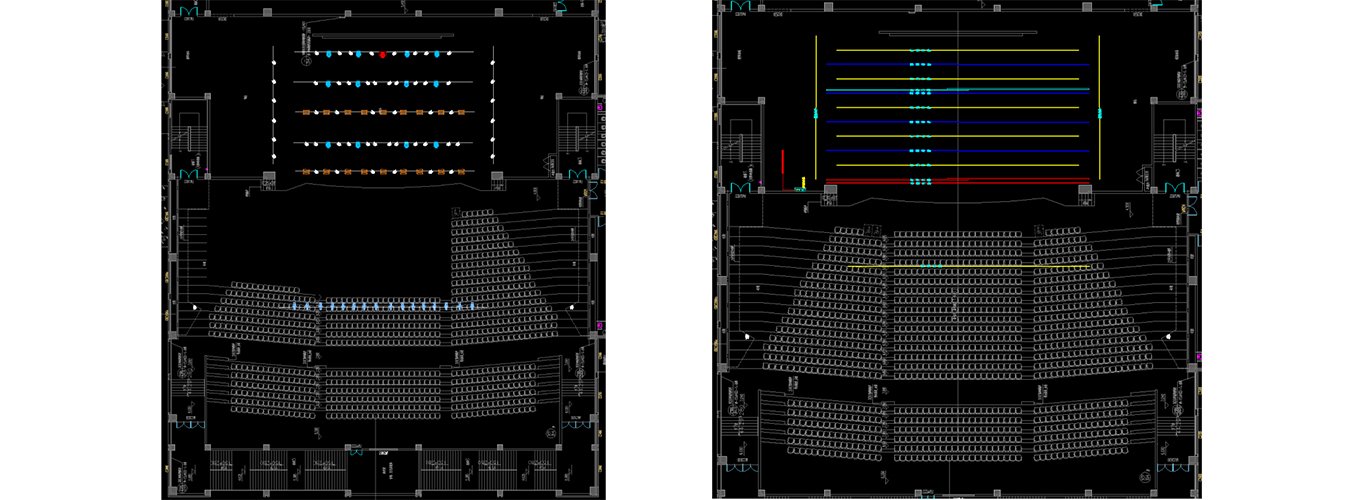
3. Side Lighting Configuration Instructions: The purpose of side lighting is to create a sense of directionality from the sides of the stage, adding depth and a three-dimensional effect to the performers in the main acting area. It can serve as auxiliary lighting to illuminate the performers’ faces, enhance the depth of the set, and add artistic rendering to the characters and the stage environment.
A. Lighting setup is as follows:
Left Side Light: 6 Par lights, capable of color washing, cool light, warm light, etc.
Right Side Light: 6 Par lights, capable of color washing, cool light, warm light, etc.
B. Arrangement and Projection Methods:
The projection distance of side lighting varies from near to far, and the beam angle changes from near to far, offering a wide range of possibilities. Profiling light from one or both sides can emphasize and highlight side contours, making it suitable for creating a sense of volume in relief sculptures, figures, and similar subjects. Dual-side lighting can produce distinctive “sandwich lighting” effects, but the light ratio between the front auxiliary light and the side lighting must be adjusted to achieve a more refined modeling effect.
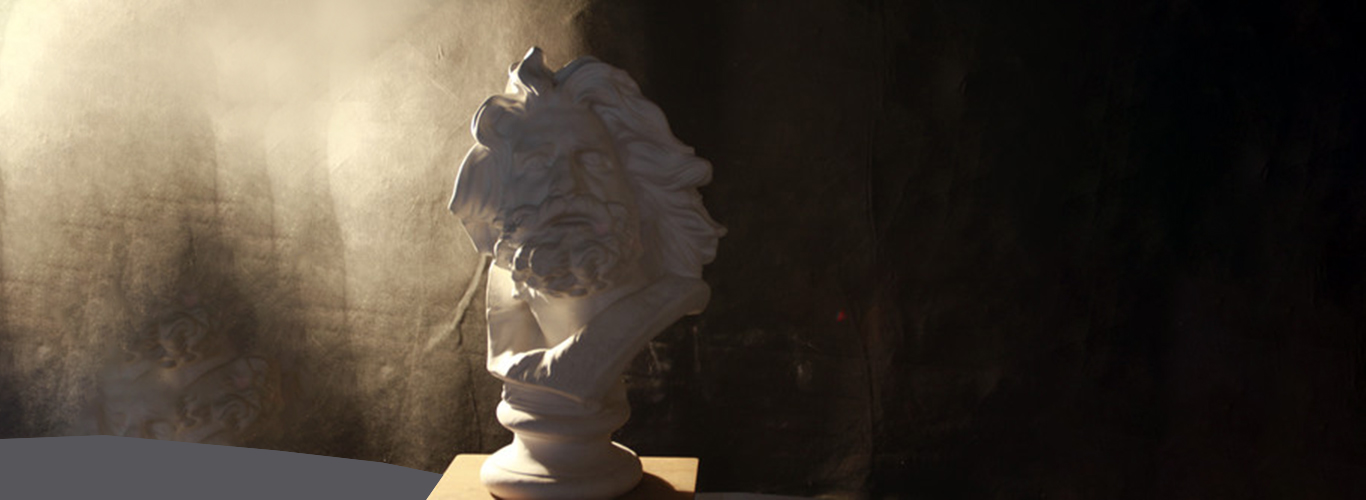
4. Floor Light Setup Instructions: Floor lights are fixtures placed directly on the floor or mounted on stands. They can be positioned at appropriate locations on the stage according to lighting needs to enhance the atmosphere. Their angles can be adjusted at any time to illuminate performers and scenery from the side.
A. The lighting setup is as follows:
Floor Lights: 6 three-in-one moving head lights
B. Lighting Arrangement and Projection Methods:
The angle between the floor lights and the performers, as viewed from the audience, generally forms a 45°–90° angle. This lighting highlights the surface texture of objects, creating a half-light, half-shadow effect on objects and facial features. The projected light produces a strong three-dimensional effect, conveying a sense of determination and power; all other aspects are the same as for side lighting.
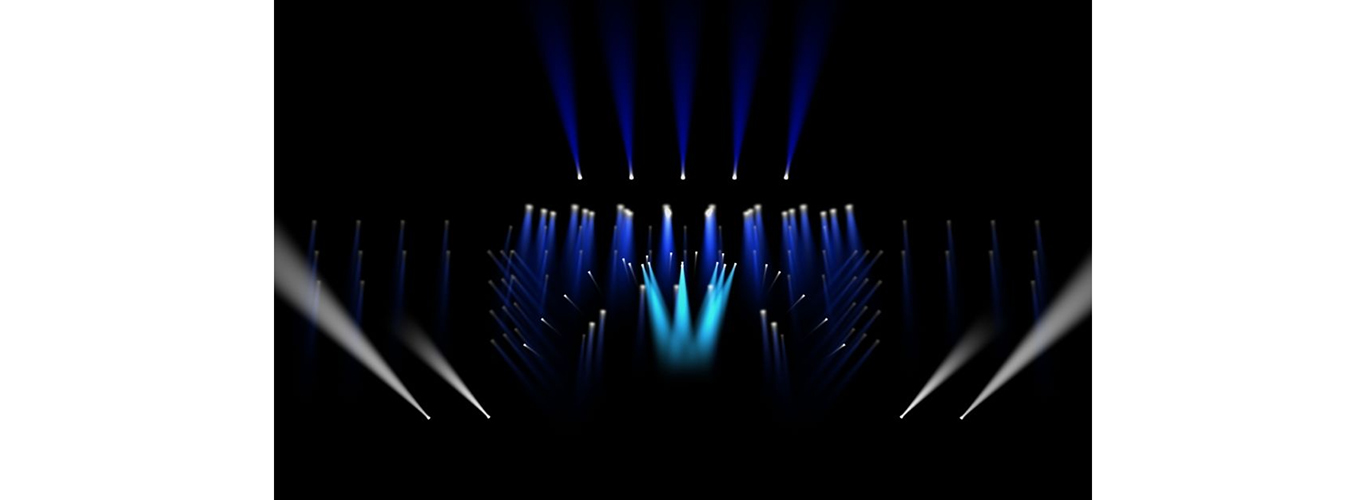
II. Theaters:
A theater typically refers to a venue specifically designed for cultural and artistic performances such as plays, operas, ballets, and concerts. It not only enhances the entertainment value and artistic quality of performances but also elevates the theater’s professional image and the audience’s experience.
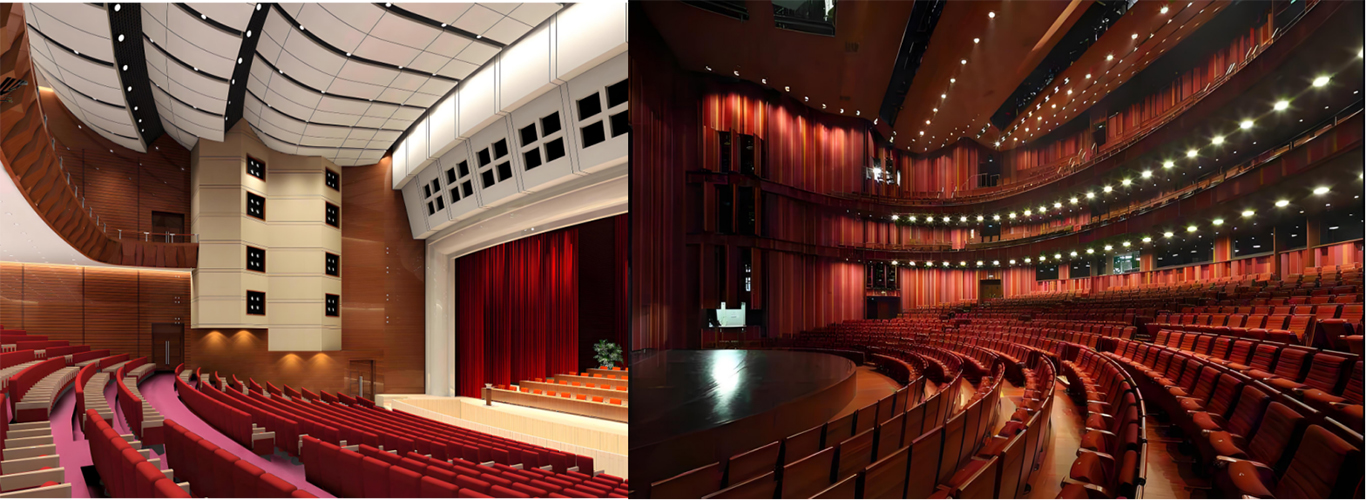
The Importance of Theater Lighting:
• Setting the Mood: Stage lighting uses color, brightness, and the direction of light to create an atmosphere that aligns with the plot. Whether it’s a tragedy, comedy, or suspenseful drama, appropriate lighting effects help the audience immerse themselves in the story more quickly and enhance emotional resonance.
• Guiding Visual Focus: The theater’s lighting system can guide the audience’s gaze, highlighting key characters or objects on stage. Through focused lighting and dynamic changes, the director can direct the audience’s attention and emphasize a specific performance or scene.
• Creating a Sense of Space: Through various lighting effects, stage lighting helps create a sense of spatial depth on stage. Whether depicting vast outdoor scenes or confined indoor spaces, lighting can effectively convey these environments visually.
• Expressing Emotions: The color and intensity of lighting can convey different emotions and moods. For example, warm-toned lighting can create a cozy and comfortable atmosphere, while cool-toned lighting may express loneliness or indifference.
Theater:
The stage lighting positions should be arranged in a comprehensive, three-dimensional layout. Front lights, first top light, second top light, third top light, fourth top light, fifth top light, floor wash, left side light, right side light, left wing light, right wing light, follow spots, footlights, and column lights—among others—form a comprehensive lighting array. Lighting points are distributed across all areas of the stage to eliminate blind spots, allowing for flexible and versatile combinations as needed.
In accordance with the Client’s vision, the stage lighting system should be designed to auditorium standards for use in cultural and artistic performances. This proposal incorporates:
one front light, five top lights, six side lights, four wing lights, and one floor wash light.
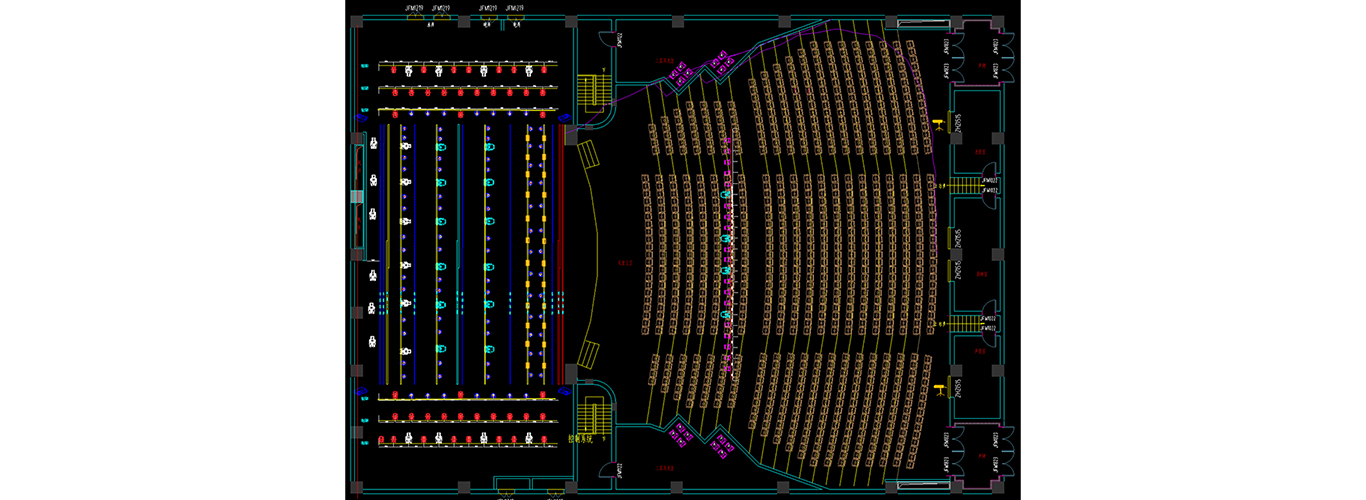
Theater Design:
1. Front Lighting Configuration: Front lighting serves as the primary lighting source for the front of the performance area. It is primarily used to illuminate the front portion of the stage, providing front lighting for performers to highlight their profiles or create a three-dimensional effect for objects on stage.
A. Lighting fixtures are configured as follows:
Front Lighting: 18 profile spotlights, with adjustable color temperature (cool/warm)
Installed approximately every 1.5 to 2 meters along the front lighting truss above the audience.
Additionally, 4 cutting lights are designed to project any pattern onto the stage, enhancing the visual effect.
B. Lighting Arrangement and Projection Methods:
Cross-projection: Enhances brightness in the center and depth of the stage;
Spotlighting: Intensifies illumination in specific performance areas of the stage.
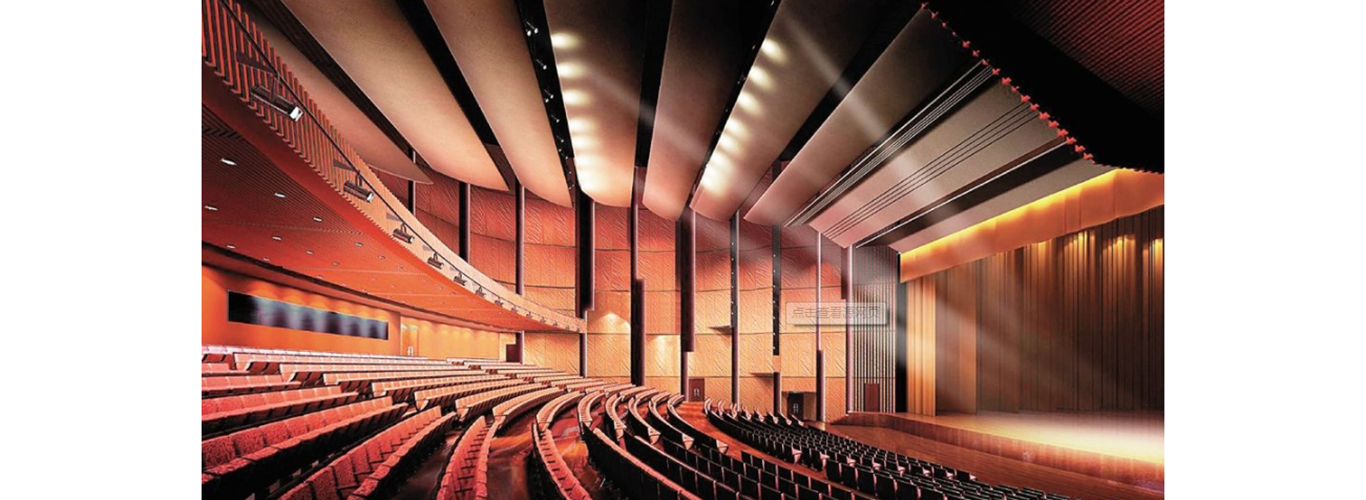
2. Overhead Lighting Configuration Instructions: Overhead lighting is installed above the stage at intervals of approximately 1.2 m to 2.0 m. The fixtures are suspended from the bottom of the lighting trusses and serve to provide necessary illumination for the performance space extending into the depth of the stage. Overhead lighting includes front lighting and backlighting, which can be arranged in overlapping patterns on the same truss. Fixtures may be configured according to the performance requirements.
A. The distribution of fixtures is as follows:
• First Overhead Lighting: 13 Par lights, 12 conference lights; adjustable color temperature; effects capable
• Second Overhead Lighting: 13 Par lights, 12 conference lights; adjustable color temperature; effects capable
• Third Overhead Lighting: 13 Par lights, 6 profile lights; capable of projecting any pattern
• Fourth Overhead Lighting: 13 Par lights, 6 profile lights; capable of projecting any pattern
• Fifth lighting tier: 13 PAR lights and 6 three-in-one lights, capable of producing beams, colored effects, and patterns
B. Lighting Arrangement and Projection Methods:
The first overhead light should be coordinated with the front lighting to illuminate the main acting area; when coordinating these lights, pay attention to the height of the characters. The first overhead light can serve as a fixed light source, and select lighting fixtures to enhance the illumination of key points in the performance area. The second and third lights can be directed straight toward the back of the stage, projected vertically downward, or used as backlighting directed forward, depending on the needs of the scene; this enhances the lighting of the characters’ silhouettes and the spatial depth of the set.
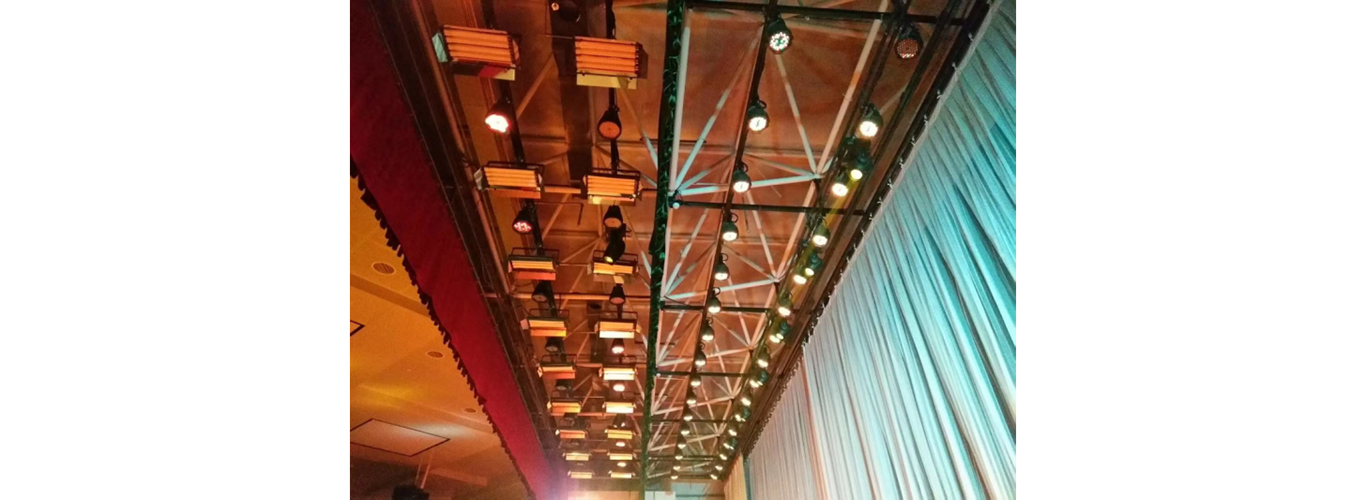
3. Left Side Light Setup Instructions: As a modeling light directed diagonally from the front of the stage, it is used to enhance the three-dimensionality of characters and scenery, creating a front-side lighting effect. The beam angle of the side light should be lower than that of the front light, and its projection distance should be shorter. The lighting fixtures required are similar to those for the front light.
A. Lighting setup as follows:
Left side light: 4 profile spotlights, arranged in two tiers (top and bottom), with light emitted from two openings to create a sense of depth for performers on stage.
B. Lighting arrangement and projection methods:
The side light serves as auxiliary lighting to the front light, used for character contouring;
It can be used from one or both sides to enhance the stage’s color and atmosphere.
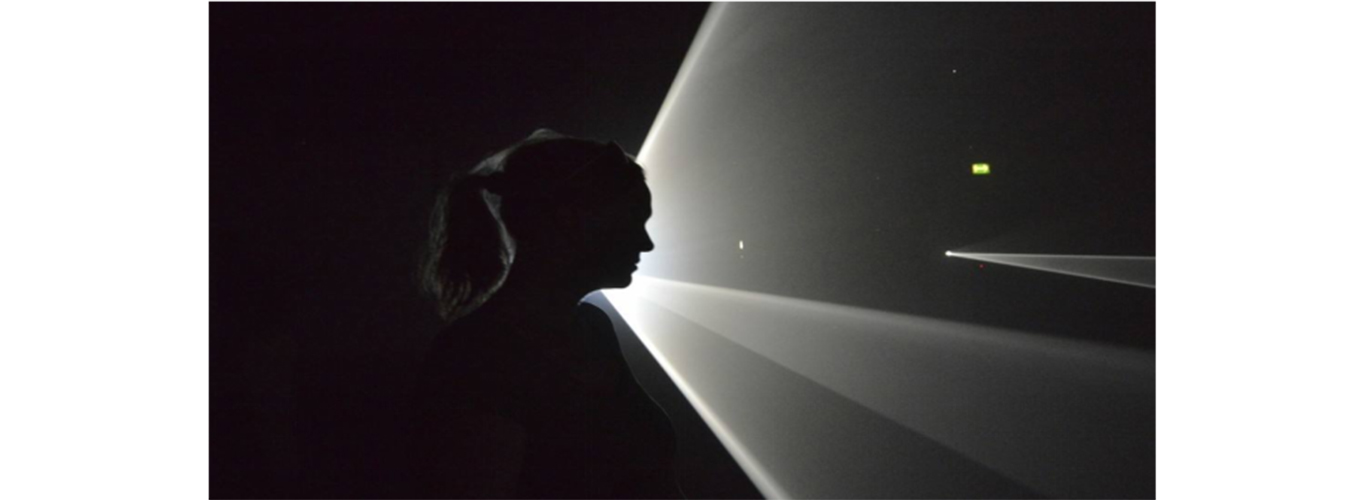
4. Right Side Light Setup Instructions: As a modeling light directed diagonally from the front of the stage, it is used to enhance the three-dimensionality of characters and scenery, creating a front-side lighting effect. The beam angle of the side light should be lower than that of the front light, and its projection distance should be shorter. The lighting fixtures required are similar to those for the front light.
A. Lighting setup as follows:
Right side light: 4 profile spotlights, arranged in two tiers (top and bottom), with light emitted from two openings to create a sense of depth for performers on stage.
B. Lighting arrangement and projection methods:
The side light serves as auxiliary lighting to the front light, used for character contouring;
It can be used from one or both sides to enhance the stage’s color and atmosphere.
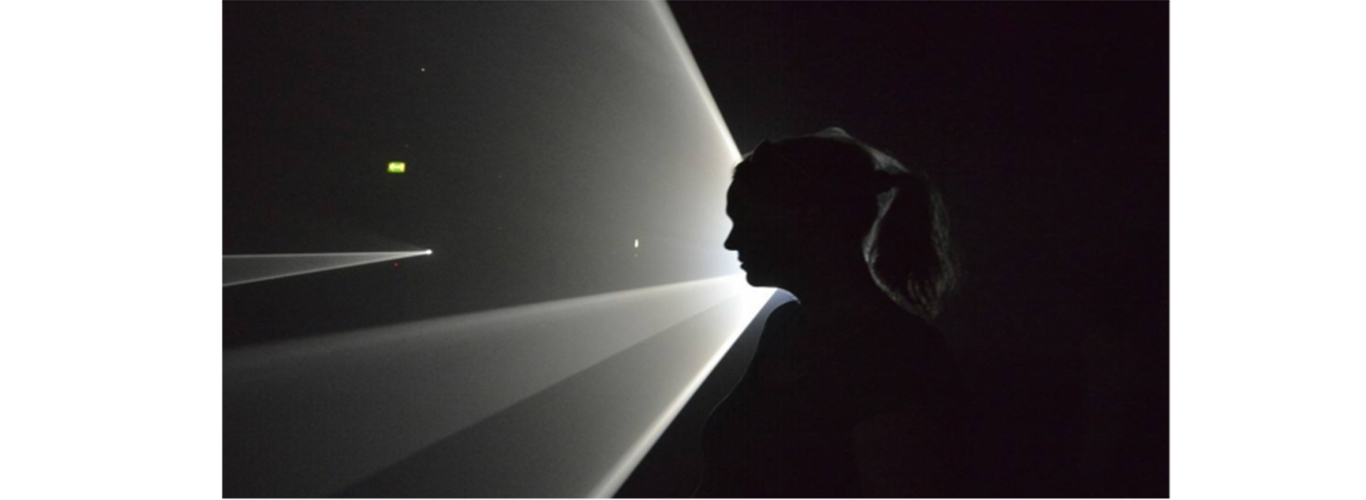
5. Side Lighting Configuration Instructions: The purpose of side lighting is to create a sense of directionality from the sides of the stage, adding depth and a three-dimensional effect to the performers in the main acting area. It can serve as auxiliary lighting to illuminate the performers’ faces, enhance the depth of the set, and add artistic rendering to the characters and the stage environment.
A. The lighting configuration is as follows:
Left Side Lighting: 7 Par lights, 20 spotlights, and 4 three-in-one fixtures, installed in three tiers (top, middle, and bottom) to enhance three-dimensionality; capable of producing beam effects, color washes, patterns, and warm lighting, etc.
Right Side Lighting: 7 Par lights, 20 spotlights, and 4 three-in-one fixtures, installed in three tiers (top, middle, and bottom) to enhance three-dimensionality; capable of producing beam effects, color washes, patterns, and warm lighting, etc.
B. Lighting Arrangement and Projection Methods:
The projection distance of side lighting ranges from near to far, and the beam angles vary widely from near to far. Shaping light from one or both sides can emphasize and highlight side contours, making it suitable for rendering three-dimensional effects such as reliefs and figures. Bilateral side lighting can create distinctive clamshell lighting effects, but the light ratio between the front auxiliary light and the side lighting must be adjusted to achieve a more refined shaping effect.
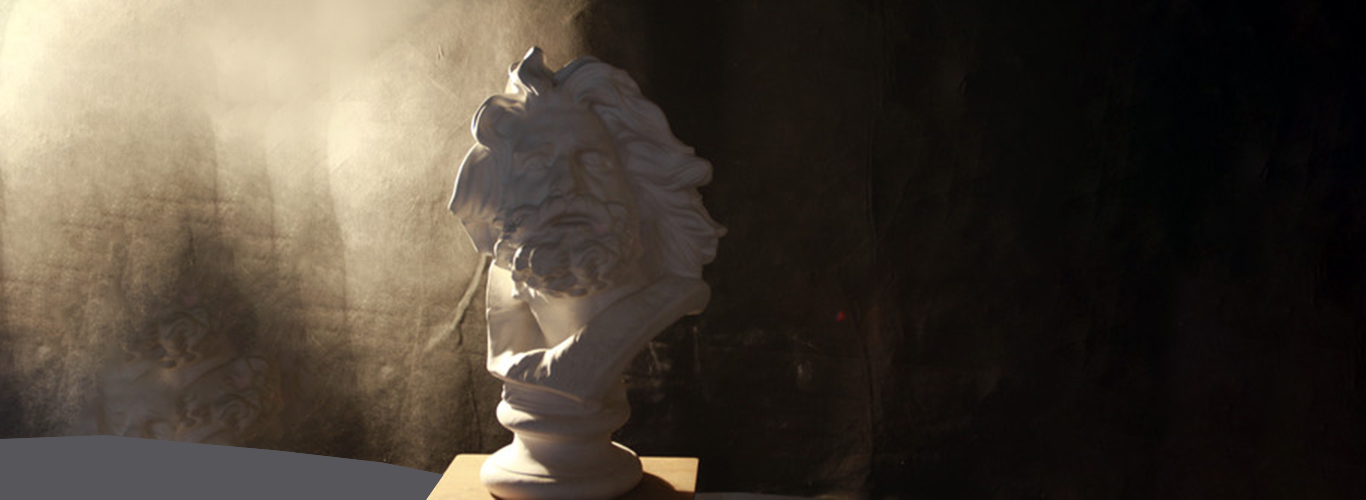
6. Floor Light Setup Instructions: Floor lights are fixtures placed directly on the floor or mounted on stands. They can be positioned at appropriate locations on the stage according to lighting needs to enhance the atmosphere. Their angles can be adjusted at any time to illuminate performers and scenery from the side.
A. The lighting setup is as follows:
Floor Lights: 6 three-in-one moving head lights
B. Lighting Arrangement and Projection Methods:
The angle between the floor lights and the performers, as viewed from the audience, generally forms a 45°–90° angle. This lighting highlights the surface texture of objects, creating a half-light, half-shadow effect on objects and facial features. The projected light produces a strong three-dimensional effect, conveying a sense of determination and power; all other aspects are the same as for side lighting.
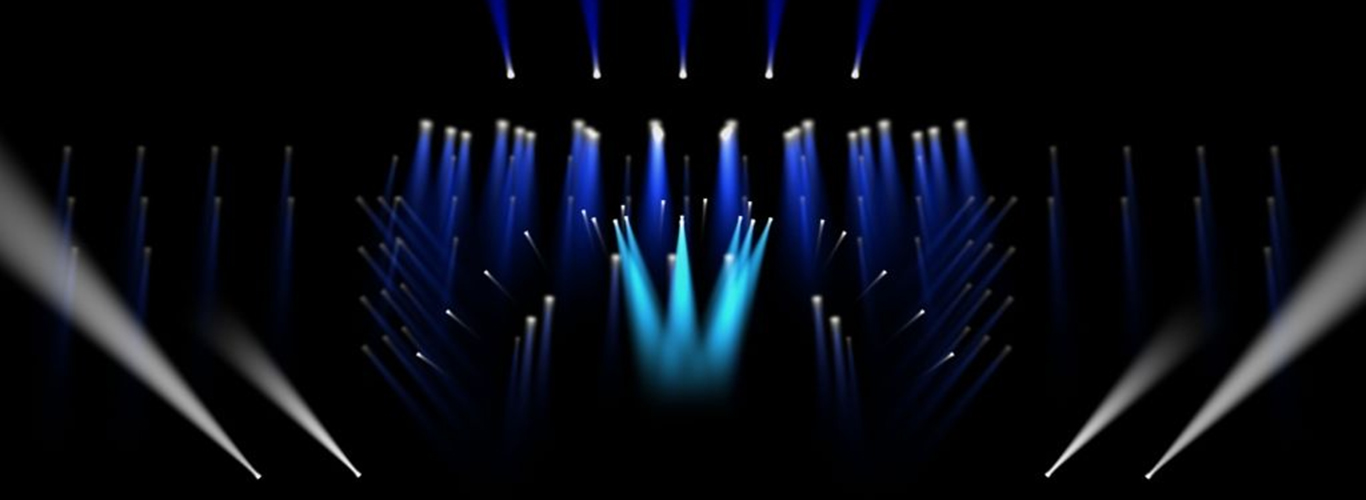
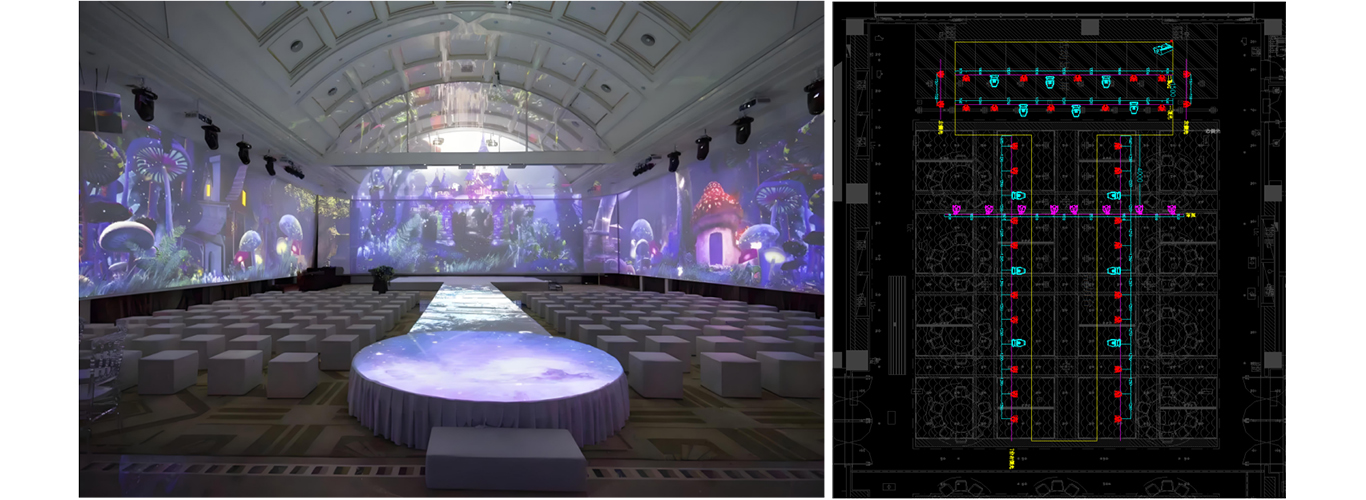
III. Banquet Hall:
A banquet hall refers to a venue used for wedding celebrations, corporate dinners, large gatherings, speeches, presentations, press conferences, product exhibitions, small- and medium-scale cultural performances, dances, and other similar events.
The stage lighting system is not only a decorative element within the banquet hall but also a key factor in creating ambiance, enhancing the visual experience, and elevating the quality of the event.
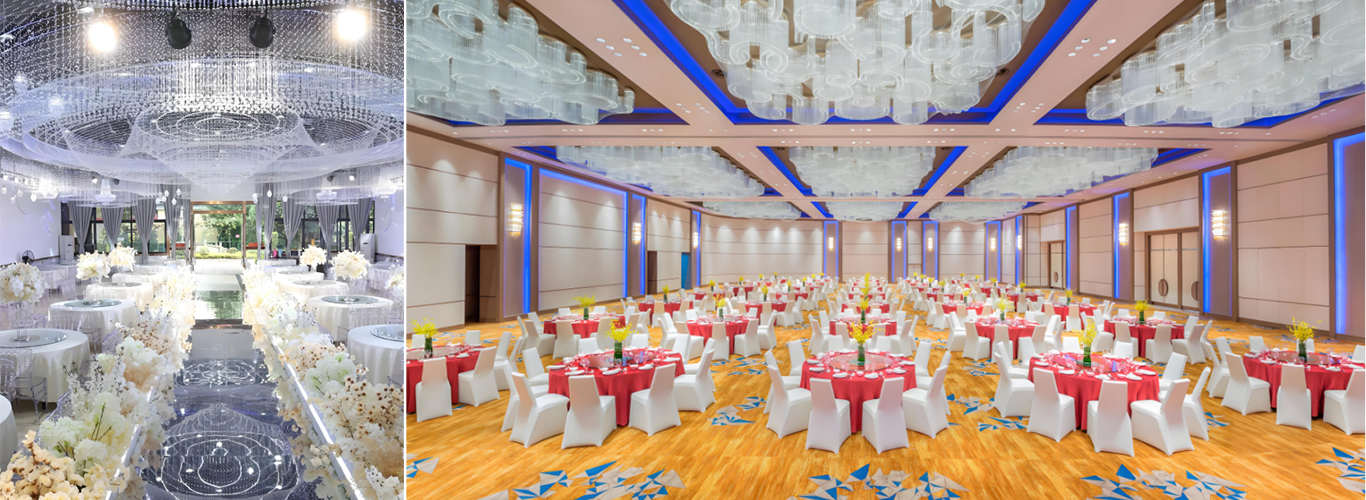
For banquet halls with a runway, it is essential to clearly define the runway area during the design and planning phases, particularly with regard to the stage lighting system and professional sound system. This runway serves as a “red carpet” and a focal point for the lighting.
IV. Multipurpose Sports Arena:
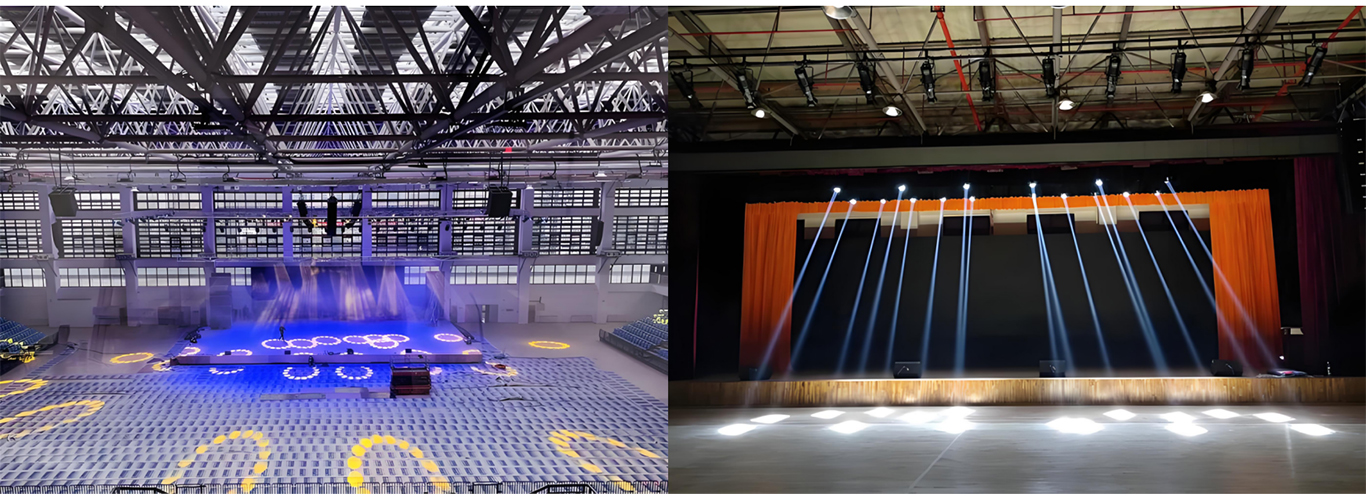
A multipurpose sports arena typically refers to a comprehensive indoor venue capable of hosting a variety of sporting events, cultural activities, exhibitions, and conferences. It not only enhances the entertainment value and artistic quality of events but also improves the audience experience and the arena’s functionality, thereby meeting the diverse needs of various activities.
The Importance of Multipurpose Arenas:
• Visual Enhancement: Arenas typically host a variety of events, such as sports competitions, concerts, and exhibitions. Stage lighting systems enhance the visual presentation of these events, ensuring that audiences have a clear view from any seat.
• Atmosphere Creation: Through the use of color, brightness, and dynamic effects, stage lighting systems can create an atmosphere that aligns with the event’s theme, enhancing audience engagement and immersion.
• Highlighting Key Elements: During sporting events, spotlights can focus on the playing field or key plays, allowing both the audience and television broadcasts to capture the details of the game more clearly.
• Artistic Expression: At concerts or other performance events, lighting can be integrated with the performing arts to enhance the artistic effect—for example, by using lighting changes to complement the rhythm and emotion of the music.
Multipurpose Gymnasium Design:
1. Front Lighting Configuration: Front lighting serves as the primary lighting source for the front of the performance area. It is primarily used to illuminate the front portion of the stage, providing front lighting for performers on stage to highlight their figures or create a three-dimensional effect for objects on stage.
A. Lighting Fixture Configuration:
Front Light 1: 11 front lights, with adjustable color temperature (cool/warm)
Installed above the audience; one fixture is placed approximately every 1.5–2 meters along the front lighting truss.
Fixture Types: Four-head fixtures, profile spotlights
B. Fixture Arrangement and Projection Methods:
Cross-projection: Enhances brightness in the center and depth of the stage;
Spotlighting: Intensifies illumination in specific performance areas of the stage.
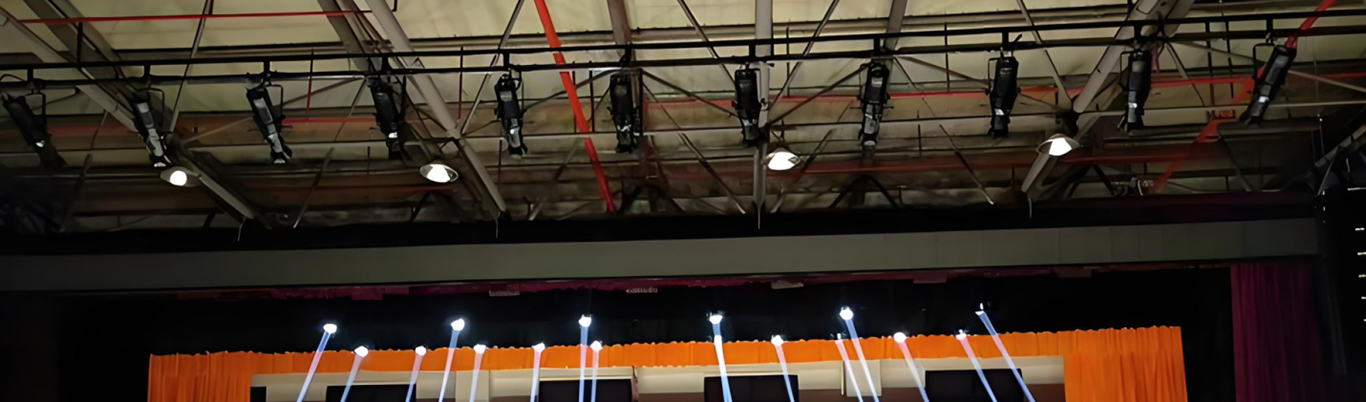
2. Overhead Lighting Configuration Instructions: Overhead lighting is installed above the stage at intervals of approximately 1.2 m to 2.0 m. The fixtures are suspended from the bottom of the lighting trusses and serve to provide necessary illumination for the performance space extending into the depth of the stage. Overhead lighting includes front lighting and backlighting, which can be arranged in overlapping patterns on the same truss. Fixtures may be configured according to the performance requirements.
A. The distribution of fixtures is as follows:
• First Overhead Lighting: 13 Par lights, 12 conference lights; adjustable color temperature; effects capable
• Second Overhead Lighting: 13 Par lights, 12 conference lights; adjustable color temperature; effects capable
• Third Overhead Lighting: 13 Par lights, 6 profile lights; capable of projecting any pattern
• Fourth Overhead Lighting: 13 Par lights, 6 profile lights; capable of projecting any pattern
• Fifth lighting tier: 13 PAR lights and 6 three-in-one lights, capable of producing beams, colored effects, and patterns
B. Lighting Arrangement and Projection Methods:
The first overhead light should be coordinated with the front lighting to illuminate the main acting area; when coordinating these lights, pay attention to the height of the characters. The position of the first overhead light can serve as a fixed light source, and select some fixtures to enhance the lighting at key points in the performance area. The second and third lights can be directed straight toward the back of the stage, projected vertically downward, or used as backlighting directed forward, depending on the needs of the plot; this enhances the lighting of the characters’ silhouettes and the spatial depth of the scenery.
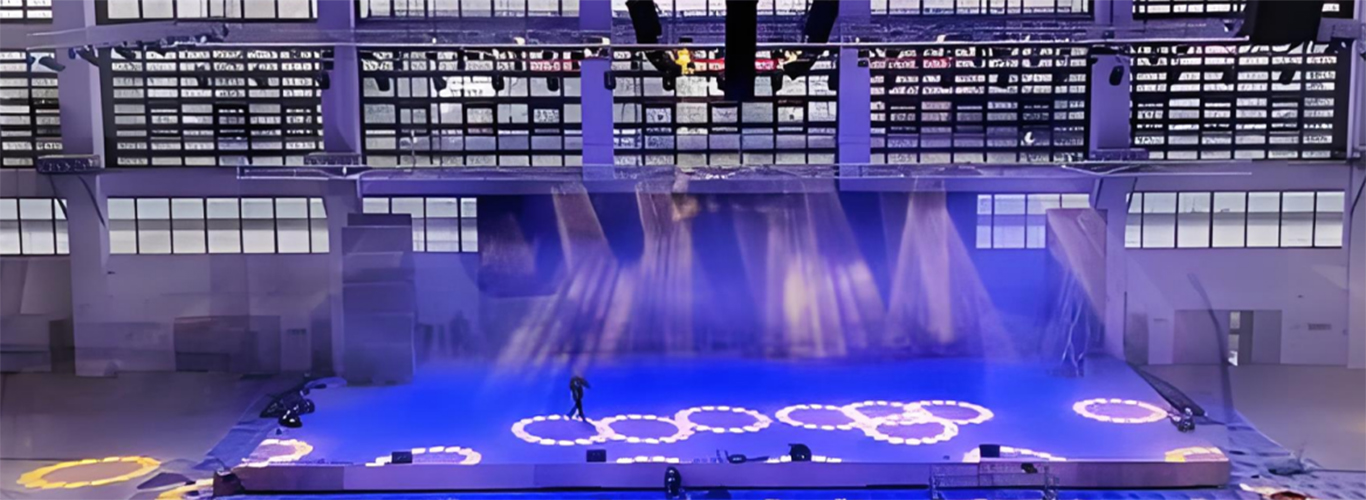
3. Side Lighting Configuration Instructions: The purpose of side lighting is to create a sense of directionality from the sides of the stage, adding depth and a three-dimensional effect to the performers in the main acting area. It can serve as auxiliary lighting to illuminate the performers’ faces, enhance the depth of the set, and add artistic rendering to the characters and the stage environment.
A. Lighting setup is as follows:
Left side lighting: 6 Par lights, capable of color washing, cool light, warm light, etc.
Right side lighting: 6 Par lights, capable of color washing, cool light, warm light, etc.
B. Arrangement and Projection Methods:
The projection distance of side lighting varies from near to far, and the beam angle changes from near to far, offering a wide range of possibilities. Profiling light from one or both sides can emphasize and highlight side contours, making it suitable for creating a sense of volume in relief sculptures, figures, and similar subjects. Dual-side lighting can produce distinctive “sandwich lighting” effects, but the light ratio between the front auxiliary light and the side lighting must be adjusted to achieve a more refined modeling effect.
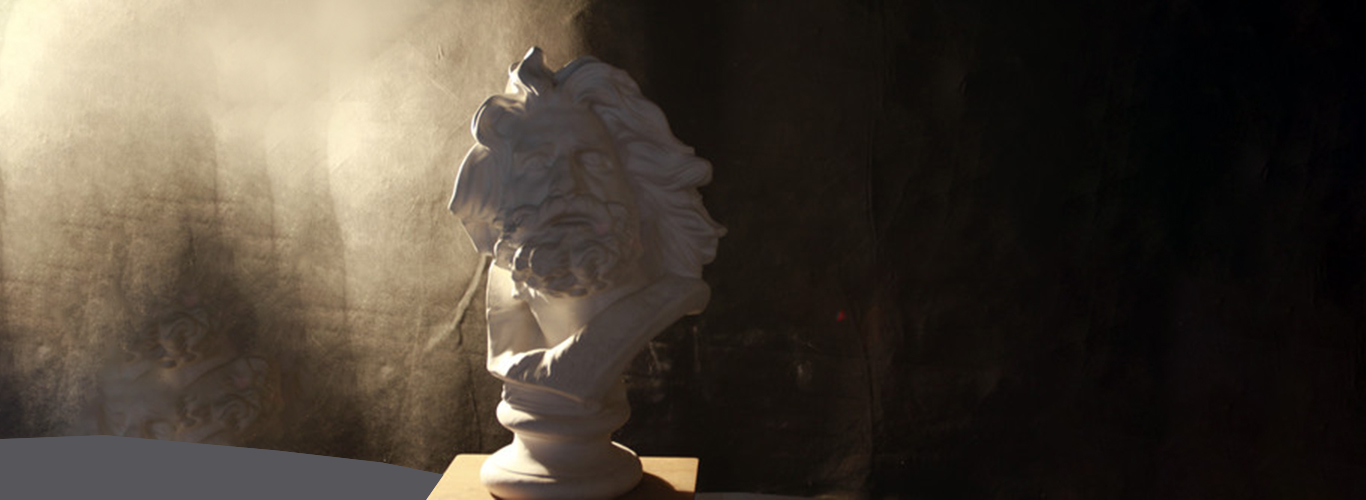
4. Floor Light Setup Instructions: Floor lights are fixtures placed directly on the floor or mounted on stands. They can be positioned at appropriate locations on the stage according to lighting needs to enhance the atmosphere. Their angles can be adjusted at any time to illuminate performers and scenery from the side.
A. The lighting setup is as follows:
Floor Lights: 6 three-in-one moving head lights
B. Lighting Arrangement and Projection Methods:
The angle between the floor lights and the performers, as viewed from the audience, generally forms a 45°–90° angle. This lighting highlights the surface texture of objects, creating a half-light, half-shadow effect on objects and facial features. The projected light produces a strong three-dimensional effect, conveying a sense of determination and power; all other aspects are the same as for side lighting.
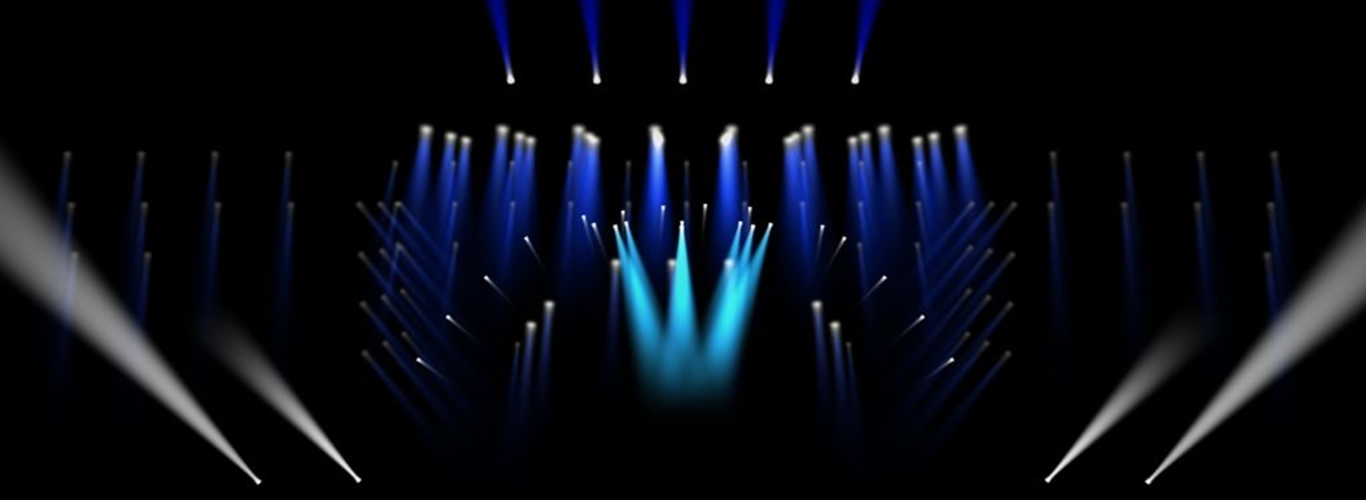
V. Studio:
A studio typically refers to a facility specifically designed for recording television programs, live online broadcasts, video production, and other audiovisual content. It not only enhances the audiovisual quality of a program but also strengthens its artistic expression.
The Importance of the Studio:
• Visual Presentation: The studio’s lighting system is responsible for providing adequate illumination for the cameras, ensuring clear images and true-to-life colors. Good lighting can enhance a program’s visual appeal and provide viewers with a better viewing experience.
• Setting the Mood: Lighting can effectively create different atmospheres and moods, such as the formality of a news program, the lighthearted and cheerful vibe of an entertainment show, or the intimate and focused atmosphere of an interview program.
• Highlighting Key Elements: By focusing and adjusting the lighting, the host, guests, or specific objects can be highlighted, guiding the audience’s attention and reinforcing the program’s key content.
• Creating a Sense of Space: Given the limited space in a studio, lighting can use contrasts between light and shadow and variations in color to create a virtual sense of space, making the visuals richer and more three-dimensional.
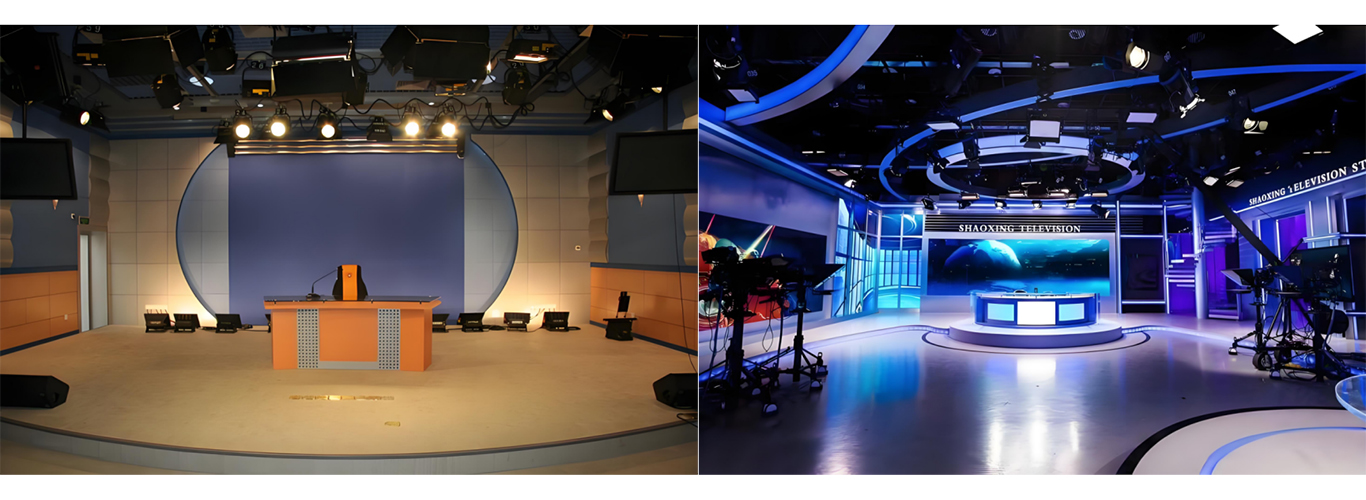
Stage lighting positions should be arranged in a comprehensive, three-dimensional layout. Lighting positions such as overhead lights, effect lights, and follow spots form a comprehensive lighting array, ensuring that every part of the stage is illuminated to eliminate blind spots, while allowing for flexible and versatile combinations as needed.
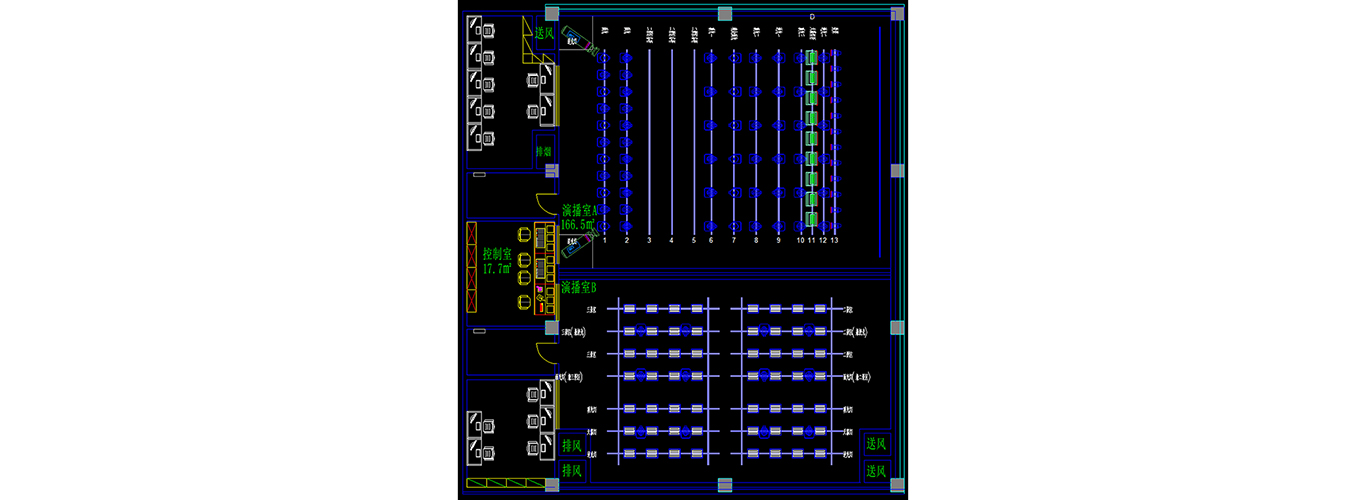
The image on the left shows two layout options: Studio A and Studio B. Both are designed to provide optimal lighting effects for program recording, live streaming, and video production:
Studio A: Effect lights, backdrop lights, audience lights, front lights, etc.
Studio B: Floodlights, front lights, backlights, etc.
Studio Design:
1. LED Panel Light Configuration: Ensure uniform lighting throughout the entire studio; avoid hot spots or dark shadows. The color temperature should be around 5600K to more closely resemble sunlight, allowing for the simulation of natural light during filming and ensuring accurate color reproduction. The CRI value must be 90 or higher.
The lighting configuration is as follows:
LED panel lights should be evenly distributed throughout the entire shooting area, with a spacing of no more than 1.5 meters between lights and approximately 1.2 meters between light poles.

2. Spotlight Configuration Instructions: Quickly adjust the angle and intensity of the light to highlight specific people or objects and guide the audience’s gaze. Additionally, ensure the light is even to avoid hard edges or excessive light spots in the shot, and avoid direct light into the camera.
A. Lighting Setup:
Right Side Lighting: 4 profile lights, arranged in two tiers (top and bottom), with light emitted from two openings to create a three-dimensional effect for performers on stage.
B. Lighting Arrangement and Projection Methods:
Side lighting serves as supplementary fill light to shape the subject;
it can be used from one or both sides to enhance the stage’s color and atmosphere.

VI. KTV:
KTV (Karaoke TV) typically refers to a venue that offers karaoke entertainment services, where customers can sing and socialize in private rooms. This not only enhances the entertainment value and appeal of KTV but also improves the customer experience, fulfilling people’s needs for leisure and social interaction, while also serving as a space to showcase personal talents and enjoy music.
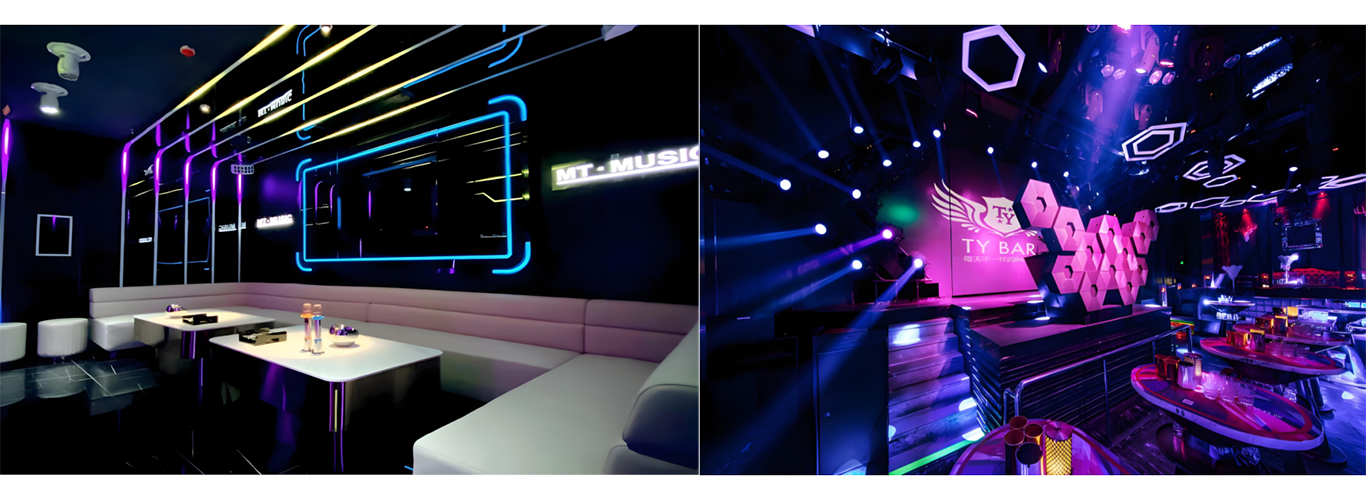
The Importance of KTV:
• Creating Atmosphere: KTV venues are places for entertainment and socializing, and stage lighting systems can create a relaxed, joyful, and vibrant atmosphere. By using lights of different colors and brightness levels, the lighting can be tailored to suit the style of different songs and the mood of the customers.
• Enhancing the Visual Experience: Dynamic lighting effects and color changes can enhance the visual experience for customers, making KTV venues more appealing. Lighting that changes in time with the rhythm of the music can elevate the overall entertainment experience.
• Personalized Customization: The stage lighting system can be customized according to customers’ preferences and needs; for example, soft lighting is suitable for romantic ballads, while intense beams and color changes are ideal for fast-paced dance tracks.
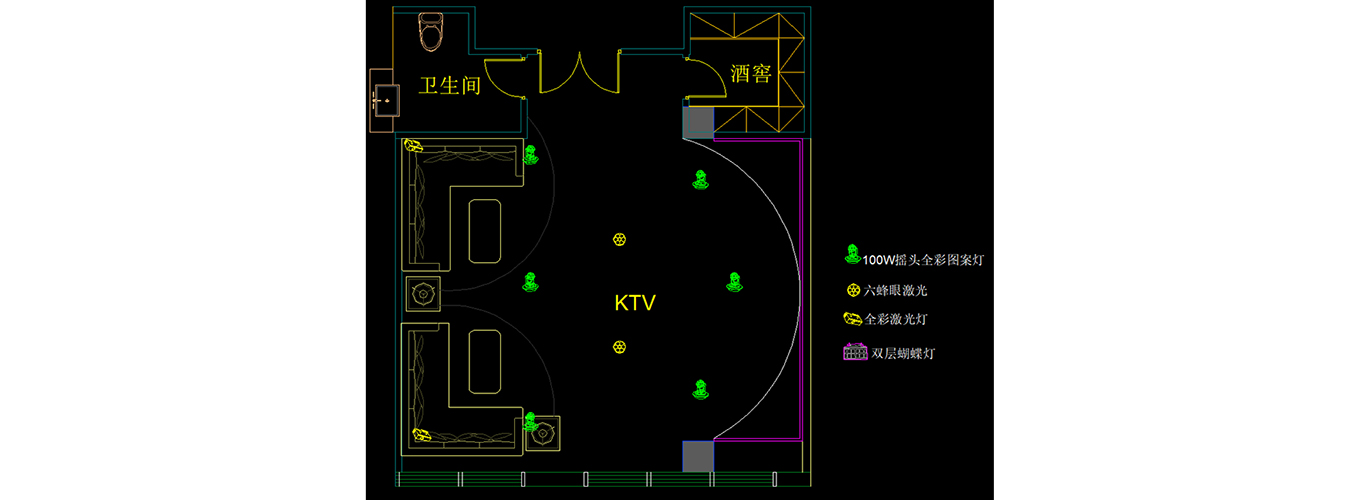
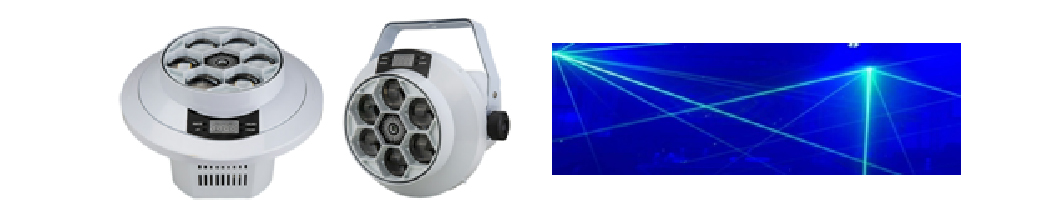
The stage lighting setup should feature a comprehensive, three-dimensional arrangement. Moving head full-color pattern lights, honeycomb lasers, full-color lasers, butterfly lights, control boxes, and other lighting fixtures should form a comprehensive lighting array, with lighting points covering every part of the stage that can be flexibly and variably combined as needed.
The image on the left shows the KTV layout and lighting placement diagram:
Honeycomb lasers: Typically 1 to 4 units, installed in the center of the KTV
Effect: If your budget allows, choose full-color lasers and place them behind the seating area; if not, opt for butterfly lights—usually two of them.
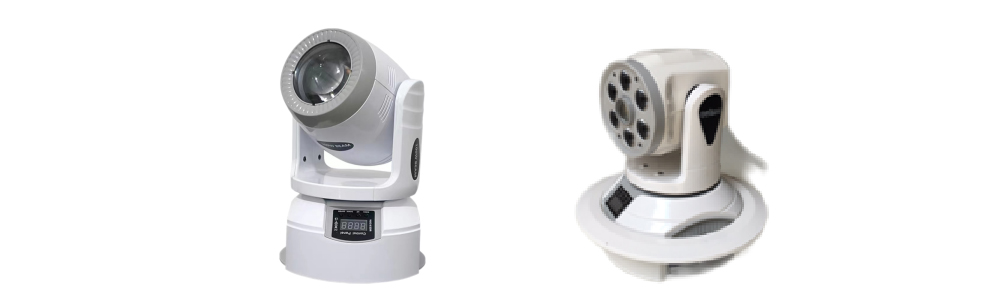
Moving Head Series: The number of lights should be even. If your budget allows, choose LED moving head beam lights; if not, choose LED moving head color-changing pattern lights. Both can project patterns and beams. “LED moving head beam lights” produce large beams with excellent effects, while “LED moving head color-changing pattern lights” work best with smoke for enhanced effects.
KTV Design:
1. LED Moving Head Light Configuration Guidelines: These lights should feature beam and pattern effects, be angle-adjustable, avoid shining directly into the audience’s eyes, and not be too large.
The lighting configuration is as follows:
Without obstructing the line of sight, place one unit every 1 to 1.5 meters facing the display screen and the audience, ensuring an even number of units.
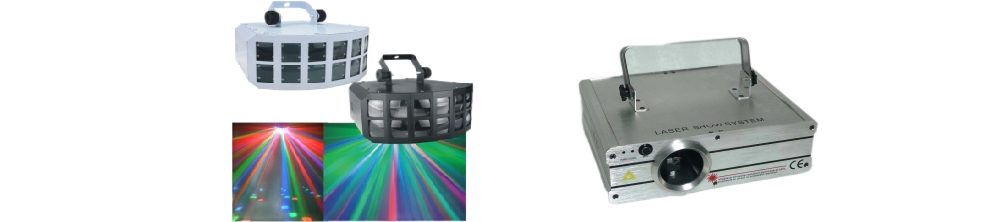
2. Full-Color Laser Configuration Instructions: Generates light and patterns that cover the entire room while avoiding direct light into customers’ eyes.
Lighting configuration is as follows:
Typically installed in the corners of a KTV room; it is recommended to install them on both sides behind the private booths, with the light directed toward the display screen. Installation on either side of the display screen, where the light is directed at the audience and shines directly into their eyes, is not recommended.
The standard configuration is two units; for larger venues, up to four units may be installed.
High-end option: Full-color animated laser lights
Budget option: Butterfly lights
3. Bee-Eye Laser Light Installation Guidelines: The light must not shine directly into customers’ eyes to prevent vision damage. Ensure that the light covers the entire room while avoiding glare on the screen.
The lighting setup is as follows:
Bee-Eye laser lights are typically installed in the space between the display screen and the seating area. Depending on the budget, the number of Bee-Eye laser lights ranges from 1 to 8, with each light spaced approximately 1.5 meters apart.
4. Smart Lighting Box Configuration Instructions:
The lighting fixtures are configured as follows:
Generally, one set is provided per private room, regardless of its size. The touchscreen should be installed near the entrance.
Communication Skills
I. Familiarize Yourself with the Settings Where Stage Lighting Is Used:
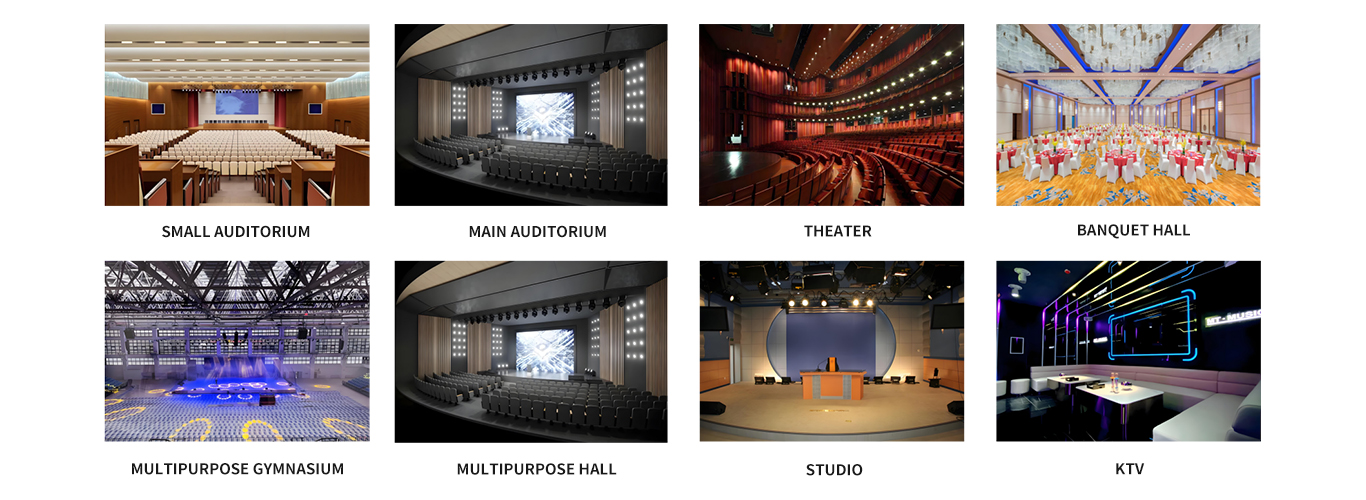
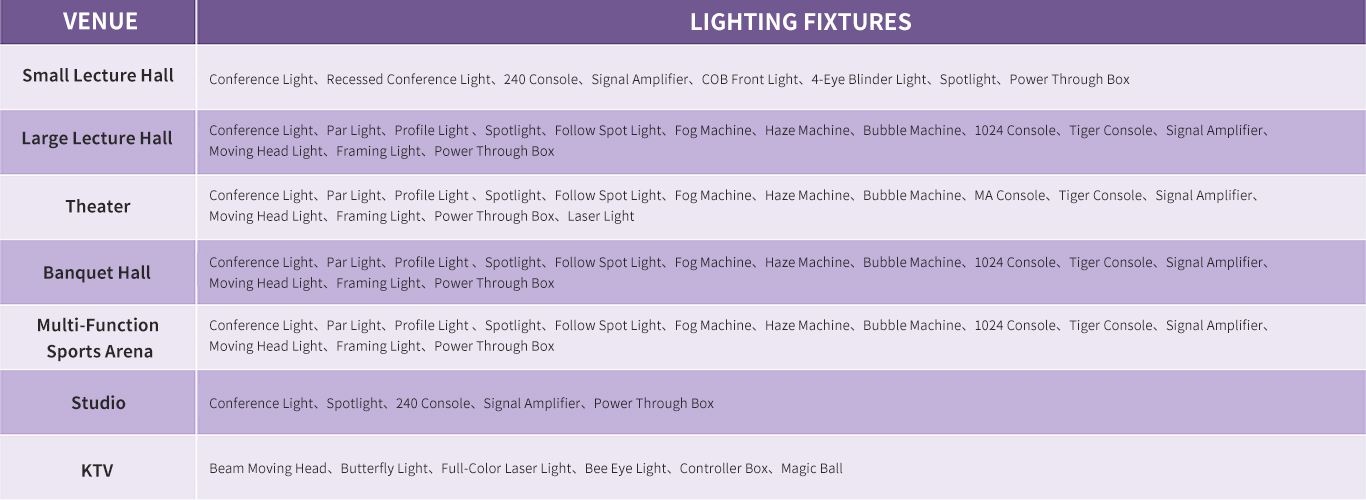
II. Understanding Stage Lighting Applications—Lighting Fixtures Used:
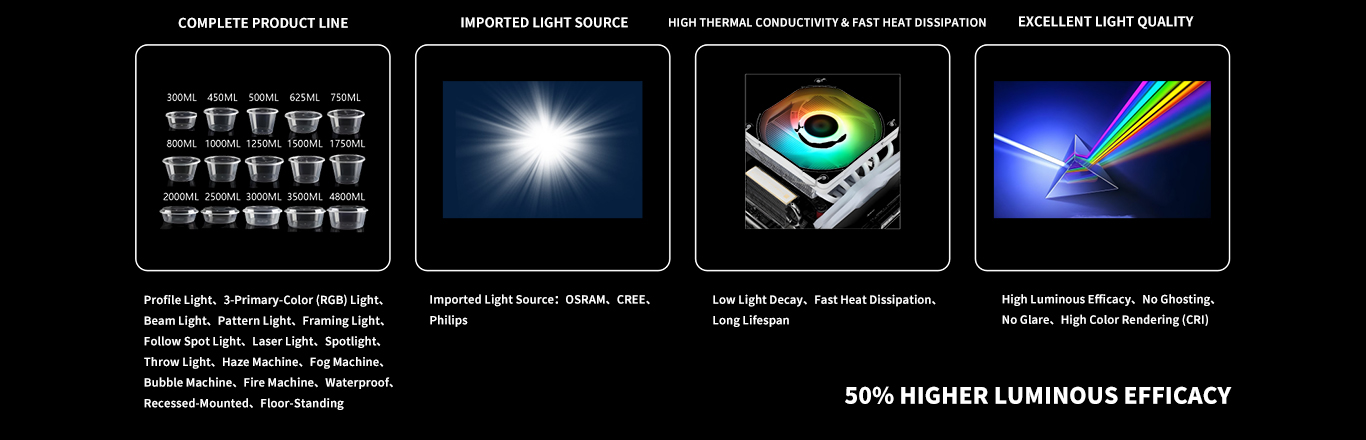
III. Understanding the Advantages of Your Own Lighting Fixtures:
IV. Understanding Project Requirements (Scope):